
After our epic trip to Walt Disney World a couple of weeks ago, I couldn’t help getting in the kitchen and putting the Mickey Mouse sandwich cutter I purchased at the unbelievably massive World of Disney store to good use! Because who doesn’t love Rice Krispies treats – and I bet you’ve never seen Rice Krispie treats that look as adorable as these:

You can find pretty much all the major food groups in Mickey form at Disney World – waffles, giant pretzels, ice cream sandwiches… but the absolute pinnacle is the Rice Krispies Mickey. Kids love ’em, adults love ’em. And if you don’t love them then you seriously need to rethink your life choices.
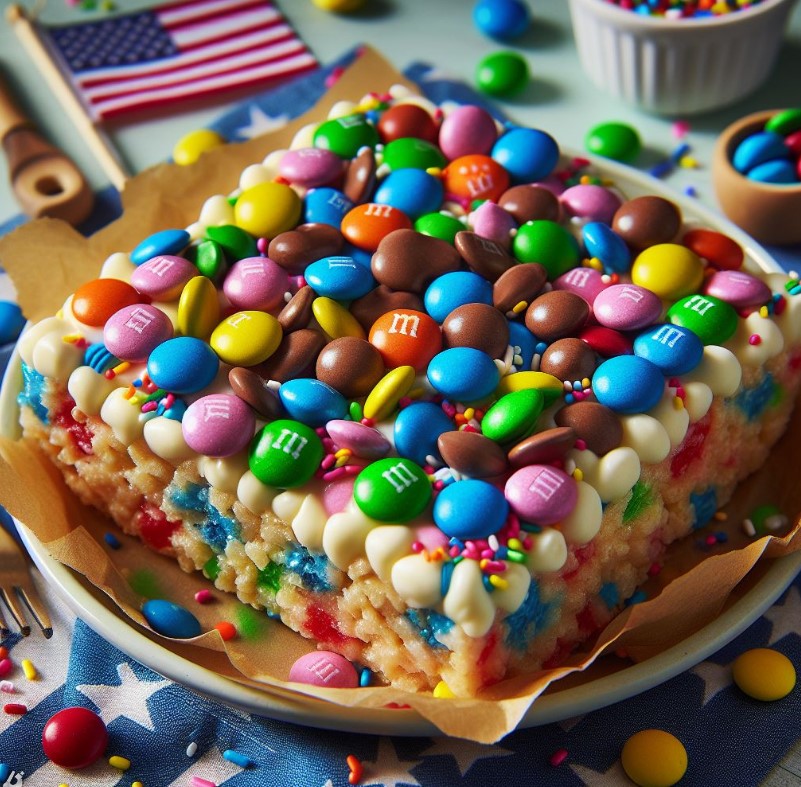
They come in SO MANY variations – but I’ve stuck to three classics for you today: Mini M&Ms, white chocolate sprinkles, and double chocolate.

If you’re a regular around here then you might have seen the USA baking haul post I shared earlier in the week – and I’ve put the Mini M&Ms and bright coloured sprinkles to good use in today’s recipe. Of course, if you can’t track down Mini M&Ms in the UK, you can use full-size ones, or even track down some Mini Smarties, which are much easier to find this side of the Atlantic.
It’s not all about the looks though guys. When it comes to the actual Marshmallow Rice Krispie treats, these beauties are just as good as you remember – yummy sticky marshmallow and crunchy pops make the best combination. But please make sure to use butter, and to stir the marshmallows pretty much consistently when melting (over a LOW heat) or prepare to experience the dismay of burnt mallow. Great news in a s’more, hideous news if you want a fabulous marshmallow Rice Krispies treat.
A couple of tips:
Make sure you use the biggest saucepan you’ve got. There’s 300g of marshmallows in here, and little mallows do not weigh very much at all. 300g is a lot more than you think! As mentioned above, you’re going to need to stir the mallows as they melt to avoid disaster, so you really will thank me if you grab the giant saucepan that you only ever really use for stew.
Melt the butter first, then add the marshmallows. I skipped this step the first time, and it ended in tears. Yes, I know you want to get to the eating as soon as possible, but skipping this step is not recommended.
Add the Rice Krispies to the saucepan of melted marshmallows, not the other way around. The melty mallows will be super sticky, so you don’t really want to spend precious time scraping it out of the inside of a saucepan. Be a bit forceful when you’re stirring the Rice Krispies in – don’t worry about crushing a couple. You need to make sure all the Krispies are coated in marshmallow, or they won’t stick together.
And when it comes to pressing the Rice Krispies treats down into your baking tray, rub some flavourless oil (I used sunflower) into your hands to avoid the gooey marshmallow getting everywhere. It works, trust me!

Don’t have lollipop sticks or a Mickey Mouse cutter? These treats work almost as well cut into squares, circles, or with whatever cutter you’ve got lying around. Everyone’s going to love them, no matter what shape they are!
MARSHMALLOW RICE KRISPIES MICKEY MOUSE POPS
Inspired by our recent trip to Disney World, you too can enjoy a Mickey Mouse Rice Krispies treat without the plane trip to Florida.
Prep Time: 20 min
Total Time: 1 hr
| INGREDIENTS | INSTRUCTIONS | STORAGE |
| 55g (1⁄4 cup) unsalted butter 300g (6 cups) mini marshmallows 150g (6 cups) Rice Krispies cereal Lollipop sticks (optional) White chocolate (optional) Dark or semi-sweet chocolate (optional) Mini M&Ms; (optional) Sprinkles (optional) | Place the butter into the largest saucepan that you have, and melt on a low heat. Once the butter has completely melted, add the marshmallows. Melt the marshmallows on low, stirring pretty much constantly, until all the mallows have melted and you have a smooth sticky goo. Remove from the heat and immediately add the Rice Krispies cereal to the saucepan. Stir until all the Rice Krispies are covered with the marshmallow – it can be a little sticky, but you will get there eventually! Spray a 9 x 13 inch baking tray with non-stick spray (or grease with butter or oil) and immediately spoon the Rice Krispies mixture into it. Spread the mixture into all the corners, and press down to make sure everything is nice and compact. The best way to do this is to rub some flavourless oil (I used sunflower oil) into your hands, as this helps you to avoid getting covered in melted marshmallow. Place in the fridge to set for an hour. Once set, remove from the fridge and turn out onto a work surface. Use a Mickey Mouse cookie cutter (or sandwich cutter) to cut the mixture into Mickey shapes. It helps to rub some flavourless oil into the cutter to stop it from getting too sticky. Insert a lollipop stick into the bottom of each of the Mickeys. For chocolate M&M; Mickey: Melt the dark chocolate, either in the microwave (stirring every 20 seconds) or over a saucepan of boiling water. Dip Mickey’s face into the chocolate, shaking off any excess, and then gently press on some mini M&Ms.; Leave to set For sprinkles Mickey: Melt the white chocolate, and dip Mickey’s face into it, shaking off any excess. Immediately dip into a plate of coloured sprinkles and then leave to set. For double chocolate Mickey: Melt the dark chocolate, and dip Mickey’s face into it, shaking off any excess. Drizzle some melted white chocolate over Mickey in lines. Leave to set. | These Rice Krispies pops are best eaten on the day of making, although they will stay fresh for 2-3 days if stored in an airtight container. They do not need to be stored in the fridge. |